Tuesday, October 4, 2011

Letter Recognition Tale-Tail

This fun format (method of play) is enjoyed by all ages. Here little ones work on recognizing small and capital letters while they have some fun.


To Make:

Make a path using 3/4" stickers on a colored file folder. Have start and finish spaces. I used the cute trucks with "T" and "t" on them from a preschool activity sticker book. In fact, they inspired the game. I would add some decorative stickers or pictures to brighten the board and attract the child. The trucks were enough decoration (you don't want to over do it). However, a little girl might prefer some pretty butterflies, ballerinas, or flowers.

Now you have to write the letters, both capital and small, on the stickers. The order is random, but the placing is important. The placing will be easier understood as you see how the game plays. Letter matches should be fairly close to each other (3-10 spaces apart). However, whatever letter is on the finish space, its match should be about halfway through the path.

To Play:

In turn, players toss a die or spin a spinner to determine how many spaces they can move their marker. They name the letter on which they have landed. However, their turn does not end here. They must find the matching letter to the space on which they landed and move to that space, ending their turn. This move to the matching letter may be a forward or a backward move.

Example of a turn:  The player shakes a 5 and moves to "E". After he has named the letter, he looks for the matching letter. They will find that the match, "e", is back two spaces. This is where their turn would end.

Now if a player were to land on the truck with small t, they would get to move all the way to the end of the path and WIN. This is always a fun surprise and a plea to play again. We also play that a player who is near the end and shakes a high enough number wins by landing on or passing the last truck.

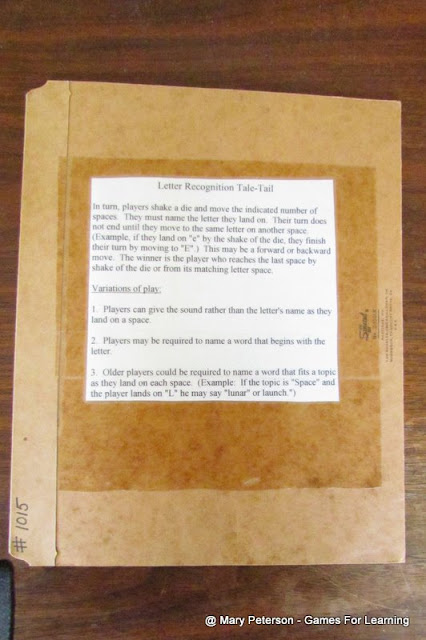
I wrote and printed out the directions along with some variations for play. I attached these to the back of the file folder.


Variations:

  1. Players can give the sound rather than the letter's name as they land on a space.
  2. Players may be required to name a word that begins with the letter.
  3. Older players could be required to name a word that fits a topic as they land on each space. (Example: If the topic is "Space" and the player lands on "L" he may say "lunar" or "launch.")
The "Tale-Tail" format is a favorite of ours and can be used for so many skills. 

Velcro Vowels

There are a couple nice things about a game like this:
  1. The child can do the activity over and over until he masters these words. If I had left the pictures in a workbook, he would have done it once and moved on. 
  2. The child can work independently once he knows how to do this type of card.
  3. You can make the card self-correcting by writing the words on the backside of the card for the child to check when he is finished.

Velcro Vowels is easy to make.


I used a small plate as a template to cut this circle from yellow posterboard. You could use one side of a colorful file folder. Divide the circle into segments and add a picture (cut from a phonics page), putting one picture in each segment. Write the word along the edge leaving out the vowel. Put a small piece of Velcro in the space. Cut some small squares of the posterboard or file folder and write the missing vowels, one on each. Add Velcro to the back. 

 
Play is independent once the child understand the game. Setting all the vowels face-up, he selects the correct vowel to finish each word. The Velcro holds the vowels in place until the whole card is filled.


Keep the cards stored with the card. Put the cards in a small zippered sandwich bag. Punch a hole through the bag and through the center of the card. Attach the bag to the card using a brad (paper fastener).


This activity could easily be made self-correcting, allowing for more independence, by writing the words on the back of the card.

Monday, October 3, 2011

Extinction - Dinosaur Addition

On Games For Learning or Games 4 Learning this morning Jennifer asked about the rules for Extinction. Thanks for asking. It made me get our game out. All of the children were begging to play after I started a game with Charles. 


Using two green file folders, taped together on the reverse side, I placed 100 3/4" white stickers to create a path. There are also yellow start and finish spaces. The large dinosaur pictures were cut from a book. (NOTE: Yes, I do cut books when making games. In fact, sometimes I buy books just because they have great pictures for cutting and add them to my cutting box.) I have made and given away several of these gameboards to family and friends. For some reason this one escaped being covered with clear Contact paper. But I will take care of that.

The spaces that have little stickers on them are used when we use a variation of the rules.

The game requires three dice. They can be the traditional dice with dots. However, I like blank dice as it lets me choose what numbers I will put on the cubes. I found some cute tiny fuzzy dinosaur stickers at a teacher store some years ago and placed one on each die.


Any playing pieces can be used, but these little dinosaurs are more fun for the game.


To Play:

Each player's turn requires three shakes of the dice. For the first shake, the player uses three dice. He saves the largest number and sets this die aside. Then he shakes the two remaining dice, again saving the highest numbered die and setting it aside. The last die is shook and kept. The total of the three dice is the players score for this turn. He moves his game piece this number of spaces along the path. He may take another turn now or pass the dice to the next player.

HOWEVER, there are some additional conditions. Any time a player shakes the dice and all the dice shaken (3, 2, or 1) are dinosaurs (or ONES)....this is called EXTINCTION. 

The penalty for an extinction can vary depending on the age of the children playing, or simply which rule the players agree upon:

1. The player's turn simply ends.

2. The player's turn ends AND he moves back to the next dinosaur space.

3. The player's turn ends AND he moves back to the spaces where this TURN began. If this rule is being used, it is important to have a marker (a penny works well) or indicate the beginning space for the turn.

4. The player's turn ends AND he moves back to the beginning of the game board. (This rule can make for a long game. However, it was the way my grandsons usually chose to play....maybe because it WAS a long game.)

Sunday, October 2, 2011

Only One Child - How Can We Play Games?

How can I play some of these fun learning games if I only have one child?

This is a question I am often asked, and I would like to offer the following suggestions: 

1. Many games can be made that rely on luck, rather than ability, to win. Board games can depend on the luck of the toss of dice, the spin of a spinner, or the play suggested with the game cards to determine a winner.

While, the players must answer questions, or give answers to math facts, or some other skill, their actual move around the board is decided by luck...this evens out the chances of winning the game.


Thus, the child can play with Mom or Dad or even Grandma and have an equal chance of winning.


2. Parents who are playing with a young child, can occasionally give incorrect responses, keeping the child on his toes, while he checks the answer key.


3. I think this is the most creative suggestion and this idea comes from my daughter Cortney, now a mother of 4 of my grandchildren, but who was about 5 at the time.


She was ttired of playing against me. One day she suggested that her dolls and teddy bears would like to play. She gathered a couple of them and gave them each a bingo card to play. Of course, this meant that someone had to help them...which she was happy to do.


So, instead of one players, she could choose to have as many as she wanted. The very nice bonus is that she got LOTS of practice on whatever skill we were drilling as she helped each of them to play. And an added bonus was...she never lost a game...one of the dolls would win and she would congratulate them and console the losers, encouraging them that they might win the NEXT time.

Spiders for Math

I went to Dollar Store. We don't celebrate halloween, however...I found some neat little things we could use. The orange tray is an silicone ice cube tray that will make little pumpkin shapes. The spiders came in a package of 50. Put these together, add dice, and you have a great math manipulative. 


Addition
Charles is working on adding columns of numbers and writing number sentences. So we made it a little game. Each of us has a tray. We each take a turn by shaking the die and adding that number of orange spiders to our tray. On our second turn, we collect black spiders. We are trying to get exactly 10 spiders in our tray. So if the number we shake is too high and we don't have enough room for that many spiders, we simply lose our turn. After our tray is full, we have to write our number sentences. By alternating between orange and black spiders, it is easy to see the numbers we have added. (Above Charles has 5 + 1 + 4 = 10.)

Our number sentences could be as simple as 6 + 4 = 10 if we have had some lucky shakes. Or it could take a number of turns and be 3 + 2 + 1 + 4 = 10. 


This game was actually much too easy for Charles, but he enjoyed the attention of being the first one to use the new spiders.

I will have to play this game with Jacob and Wesley this week for their math time. They need practice writing their numbers so it will work well for practicing that.

It will also work well for showing the boys the combinations possible for making ten.

Counting

I will also use it with the little ones for counting. Diana and Aaron will enjoy shaking the die and adding spiders to the tray and counting their collection.

All in all, this was a good buy...a fun math manipulative for $3 (two trays and a bag of spiders). Thank you, Dollar Store!


Acorns - A Variation of Oh Nuts! - a cooperative play game

My grandchildren and I go for frequent walks. They are always collecting things along the way. Some acorns have given me an idea for a variation of an old favorite...Oh Nuts! I decided to make it a cooperative play game. My grandchildren need games where they are working together. In fact, this week our Bible verse has been about unity.


How good and pleasant it is when brothers live together in unity. Ps. 133:1.


I drew a quick picture of a tree and added some circles. Charles colored the picture. We will place an acorn in each of the spaces. The object will be to work together to get all 10 of the acorns off the tree. (These could be small picture cards of nuts, buttons, chips or other markers. They could be real acorns for fun!)


NOW...how to play the new cooperative play version...

I have many sets of Oh Nuts! skill cards. I will select the cards that we are going to work with. For example, let's select the State and Capital cards. The cards have the name of a state. When Douglas draws a card, he must name the capital of the state. Charles likes to play, too. He is just learning the location of all the states right now. So instead of naming the capital, he will locate it on the map. 

The deck for an Oh Nuts! game has some additional cards. About one-third of the deck are OH NUTS! cards. These cards simply have the words on them. For some decks I got creative and even drew a nut.


To Play

After the cards have been shuffled and placed in a draw pile, play begins. The first player draws a card and gives the correct response. If he is correct, his turn continues and he draws another card. He continues to draw cards and give responses until he draws an "Oh Nuts!" card. When he draws this card he gets to remove a nut from the tree and place it in our "basket" (just a small dish). Then his turn ends. If he should give an incorrect response, his turn ends without collecting a nut from the tree. Players take turns drawing cards, giving responses, and collecting "acorns."


I use care to take the focus off who has collected how many acorns but saying things like: "Wow! WE are collecting lots of acorns." "How many acorns have WE collected?" or "How many more acorns are still on the tree?"

Check out OH NUTS! Deluxe an over-sized version.

Here is how to make and play OH NUTS! includes a fun story of this game being used in a classroom.

Everything You Need to Build a Sentence

OK, I will begin by saying this was not really a GAME...at least it was not created as such...but when children began begging to play it and a non-home schooling friend of my daughters asked for a copy for herself, I began to think differently about it.

Everything You Need to Build a Sentence was originally created to teach my daughter the parts of a sentence. It was meant to introduce her to verbs, nouns, adjectives, etc. Cortney began playing with this "manipulative" and having so much fun.

What is Everything You Need to Build a Sentence? A board (one for each player) and a deck of cards in five different colors.

The Board:


Using a piece of white poster board about 4 inches tall by 12 inches long, I drew a grid. This was simply a row of six rectangles. In the first rectangle I wrote the words "A," "An," and "The" in a vertical column. The rest of the rectangles each had a color word in them.....pink, blue, green, yellow, purple.

The Cards:

The cards were made from index cards cut in fourths and corresponded to the colors on the playing board.

On the pink cards I wrote adjectives (one on each card)....like: small, fat, rich, green, silly, tough, etc.

On the blue cards I wrote nouns like: boy, dinosaur, caterpillar, astronaut, mother, etc.

On the green cards were verbs like: ran, climbed, jumped, ate, swam, etc.

On the yellow cards were prepositional phrases that would answer the question where, like: in the field, behind the barn, under the table, on the moon, inside the box, etc.

On the orange cards were phrases that would answer the question when, like: in the morning, after lunch, in May, on my birthday, on Christmas morning, etc.

To play: (solitaire--the way I originally intended)

The child would shuffle up each deck of cards and place them in separate piles. Using the board as a card holder for correct placement of the order of the cards, the child then draws one card from each deck and places it in the correct rectangle on the board. What she gets is a sentence. Most likely a very silly sentence, but it was a sentence.


My daughter would usually do this near me while I was busy with another activity such as preparing dinner. I would be able to listen and chat with her about her sentences.

Cortney would read me her sentence and we would laugh. Then we would talk about the sentence. I would use words like noun, verb, adjective, prepositional phrase, etc. to get her acquainted with the functions they each performed in a sentence.

Then we would talk about what might make this sentence make more sense. What if she changed the verb? Instead of having the dinosaur "swimming" under the table, maybe he would be "hiding" there. So she would keep exchanging cards, laughing at each new result, until she thought she had the best sentence. Often her mood was in "silly mode" and the sillier the sentence the more she liked it.

One day when she had a particularly silly sentence, I asked her how that could possibly happen, and Phase Two of this exercise began. She proceeded to tell me a short story of how "The purple father cried in the haystack at midnight." (or whatever, that sentence may have been....) So we started doing some creative story telling and writing. She began putting some of her stories in a book and drawing pictures to go with them.

So how did this become a GAME???

A few years later, Cortney is now 10 and Kyle is 7, we were camping for the summer. I brought along many of our games and Everything You Need to Build a Sentence was one of them. Cortney told the other children she met about this funny game she had and out it came. We had to draw some playing boards for each of the other children as they all quickly got into making sentences. Each was determined to have the silliest one. The laughter around the picnic table was so delightful to listen to.

Later that fall we got a nice letter from one of the girls that had been at the campground. She asked for a copy of the GAME....so it is official...it is a GAME.

BONUS 1: When I first created this game for Cortney, Kyle begged to play because we were obviously having so much fun playing. So I created a version for Kyle. The only difference was the reading level of the cards. Kyle needed cards that he could read himself to truly enjoy the game. So Kyle got a version he could read. Later, all the cards were just mixed together.

BONUS 2: Create cards around special interests of a child. Because I am now using these with my grandsons, I added a bunch of cards that had to do with knights, hunting, pirates, and dragons...some of their favorite things. When Diana gets reading and needs cards, she will want to be reading about princesses, ballerinas, fairies, AND all the things her brothers are doing!