OH NUTS! is an exciting way to play and learn at the same time.
First a gameboard is needed. We have used several different versions of this. In the classroom, I drew two paths along the blackboard. They each had the same number of spaces. At home, we have made a cute board on a file folder, with only one path. We have also played this outdoors with spaces drawn on the blacktop and children used as playing pieces.
A deck of cards is the next thing that is needed. After deciding what skill is to be drilled, make a deck of about 50 or more cards asking questions, or showing the skill (clocks to tell the time, math facts to give the answer, coins to count, etc....) The deck of cards also needs OH NUTS! Cards. I usually have about 1/3 of the cards be OH NUTS! Cards. For these I have drawn a peanut and written the words OH NUTS! below it.
To Play:
A player draws a card and answers the question or solves the problem. If correct, he moves his game piece one space. Then he can decide if he wishes to go again. A player may keep moving one space for each correct response he gives. However, if he gives an incorrect answer or draws an OH NUTS! Card he must return to the place where this turn began (which we indicate with a penny on a file folder or a stone on the blacktop). Play continues until one player or team gets their game piece to the end of the path.
A STORY:
This was a favorite way to drill things in our classroom. I had OH NUTS! Cards for numerous skills. One day I announced that we would play Capitalization OH NUTS! after recess. I drew the path on the blackboard as soon as the children left the room for their break. I knew that the children would probably choose to play girls against the boys. After I took a short break, I went to call the children in. They were all extra excited about coming in and could not wait to begin the game.
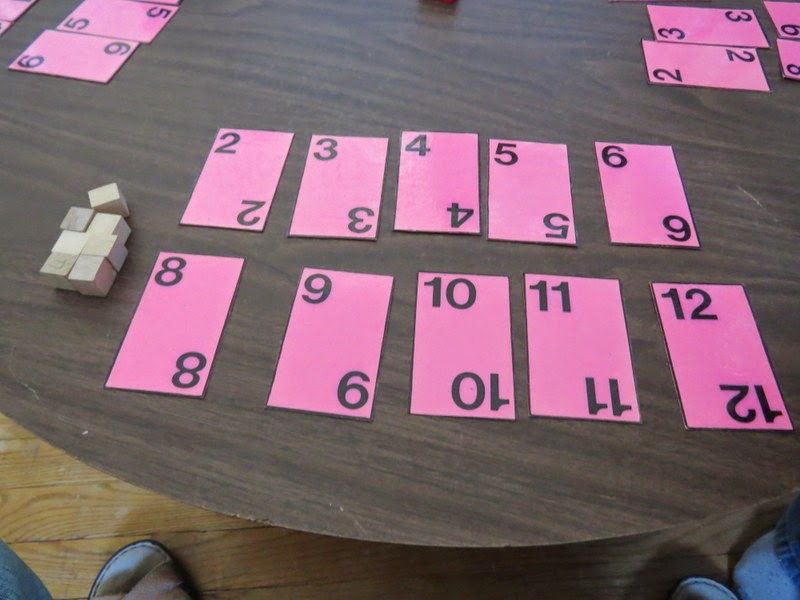
While I had a great group of kids and they were usually cooperative, I should have expected something was up as they were TOO cooperative this day. They came in and immediately began lining up for the game, obviously having already decided it would be girls against the boys. Then they girls said, "the boys can go first." NOW I should really have gotten suspicious, but I didn't YET.
Matthew was first in line on the boys team, so I read the sentence on the first card, after Matt drew it. He decided that it needed three capitals to be correct. I said he was right, so one of the boys moved their game piece ahead three spaces. I asked Matt if he wished to go again and he did. Right, again and more spaces moved. He kept choosing to go again, even though I reminded him of the danger and chance that the next card could be an OH NUTS! Card. But he continued. By this time, I was getting suspicious, especially as all the class seemed to be trying to keep from laughing, and I had also noticed that Matt's mom, the principal of our little school, was watching the game from the doorway.
Matt continued until he had completed the path and the whole class exploded in laughter...it seems the joke was on ME. With the help of Matt's mom, they had sneaked in during recess, and removed all the OH NUTS! Cards from the deck. While I had caught on to what was going on, I gave no clue that I had.
We all had a good laugh and often in the following years they would remind me of the good joke they had pulled on me.
Check out A Cooperative Version of OH NUTS!
and OH NUTS! Deluxe
Showing posts with label Multiple Ages. Show all posts
Friday, March 18, 2016
Thursday, January 14, 2016
Generic Board Games - Part 2
Here are some more generic gameboards. See original post on Generic Board Games for explanation on what these are and more on how to use them.
This easy-to-make gameboard used pictures cut from a children's book. Yes, I do cut books. Check out my blog on that topic.
This quick and easy-to-make gameboard was created to review a book on ....you guessed it - The Oregon Trail.
The cute wagon is from bulletin board border strip. The path path is Avery 3/4" brown circle stickers. The special spaces along the path a filefolder label stickers.
I don't know if you are able to read the special spaces, so here are what we chose to put on them. In order that they appear along the path:
Big River - need even number to cross.
Sight Buffalo - lose one turn to hunt.
Indian Attack - lose one turn.
and finally: Oregon Territory.
The pictures were again cut from a book. This book was a favorite for cutting animals. It was an old Golden workbook, the kind we would find near grocery check-outs. I still on rare occasions find this at garage sales--often in FREE boxes as all the pages have been done. But the pictures are so nice for games and other projects the children enjoy.
Notice that the stickers that were once white have changed over all these years, but the game is still a good one. Children always love animal related games, even if we are drilling "boring" multiplication tables.
Ocean Treasure
![]() |
| Ocean Treasure |
Who Wants to be a Millionaire
![]() |
| Who Wants to be a Millionaire |
Any skill cards can be used here. Age levels can easily be mixed as each child gets questions from his own selected skill cards. Children may even be reviewing/drilling very different subjects. Check out here how to make and play this fun game.
Oregon Trail
![]() |
| Oregon Trail |
This quick and easy-to-make gameboard was created to review a book on ....you guessed it - The Oregon Trail.
The cute wagon is from bulletin board border strip. The path path is Avery 3/4" brown circle stickers. The special spaces along the path a filefolder label stickers.
I don't know if you are able to read the special spaces, so here are what we chose to put on them. In order that they appear along the path:
Big River - need even number to cross.
Sight Buffalo - lose one turn to hunt.
Indian Attack - lose one turn.
and finally: Oregon Territory.
Animal Mania
![]() |
| Animal Mania |
The pictures were again cut from a book. This book was a favorite for cutting animals. It was an old Golden workbook, the kind we would find near grocery check-outs. I still on rare occasions find this at garage sales--often in FREE boxes as all the pages have been done. But the pictures are so nice for games and other projects the children enjoy.
Notice that the stickers that were once white have changed over all these years, but the game is still a good one. Children always love animal related games, even if we are drilling "boring" multiplication tables.
Wednesday, January 13, 2016
Who Wants to be a Millionaire?
Not having a television except for video watching, I had not seen this show until it had become a popular hit. Visiting my son, I saw it for the first time with his family. His kids were excited about watching it, though they are young and most of the questions were way beyond their education. But what interested me the most was that they still watched the whole show cheering on the contestant and shouting advice about answers and how to use his "lifelines."
As I thought about this show more in the days to come and thought about its appeal to these children, I figured there had to be a way to make this game and use it for their education.
TO MAKE:
I wanted something a little different than a traditional board game. I decided to use library pockets (You know those card holders in the back of library books, before many libraries went completely to using computers to track books.) I cut these in half, and taped them to make two pockets out of each one, as I needed smaller pockets. I wrapped the pocket portion in clear Contact paper to make it more durable.
Then I glued these in three rows (five in each row) on a pretty blue file folder. I used some file folder labels that were trimmed in blue below each one to indicate the level of question. I used the same levels as they do on the show: $100; $200; $300; $500; $1,000; $2,000; $4,000; $8,000; $16,000; $32,000; $64,000; $125,000; $250,000; $500,000; and $1,000,000. I put a gold sticker on the $1,000 and $32,000 pockets to indicate these as safe levels (Once reached this progress can not be lost.)
Now for the part that became the biggest hit with the kids: I used flat wooden spoons (The kind you can get at stores when you buy a malt cup or single serving of ice cream.) to make their playing pieces. These fit nicely into the pockets. To personalize each, I cut a snapshot of the child and glued his picture to the stick. I made some extra "players" in case a friend comes and wishes to play. He could chose from the Big Bird or Winnie the Pooh game pieces.
I made some special "lifeline" cards:
50/50 - The question will be rephrased as a True/False question or a choice of two answers will be given.
HELP - The player may ask anyone available for help...this can include calling Grandma on the phone.
BOOK - The player may get any book in the house and look up information.
NEW QUESTION - The player may choose to receive a completely new question.
HINT - The player will be given an age appropriate clue.
At the beginning of the game, these "lifeline" cards will be shuffled and three dealt to each player OR players may select three of their choice....some players like different ones than others.
For the game that I gave to my son's family, I included two sets of question cards I had from a trivia game that I bought at a used curriculum sale. I gave them the set for first graders and second graders as these were the right ages for the boys. However, I later made them some cards fitting more with things they are actually working on.....but they were so excited and wanted the game NOW.
TO PLAY:
Play is similar to the game show. However, we wanted all players to be able to play at the same time, not just one "contestant" (though this is a great game for the "only" child).
All players place their game piece in the first pocket. In turn each is asked a question and if successful, they move their game piece to the next level pocket. They may use their "lifeline" cards any time they choose for assistance with a question.
Any time a player wishes, he may quit and keep the money he has won. I made some fun money and pay the children. They can keep this money forever.....I just print some more. If a child, misses a question, he must return to the last "safe" pocket and collect that amount of money. He may, however, remain in the game...he simply must start at the beginning again.
When I was playing with the grandchildren the first time, and Kris made a mistake, he was heartbroken, but the pain seemed less as he received some fun money and realized that he was not out of the game...that he could start fresh again, with new "lifeline" cards. As it turned out, Kris was forced to start over more often than his older brother Kyle, however, Kris ended up with more money when we quit playing for the day. They left their game pieces right in the pockets so they could start up in the same places the next time we played....which turned out being within an hour as they were excited to get back to winning more money.
This game is fun for the whole family. Each member can be playing at his own level as the questions can come from cards made/selected especially for each one. Mom and Dad can participate too...get the questions from an adult trivia game for them to use.
As I thought about this show more in the days to come and thought about its appeal to these children, I figured there had to be a way to make this game and use it for their education.
TO MAKE:
I wanted something a little different than a traditional board game. I decided to use library pockets (You know those card holders in the back of library books, before many libraries went completely to using computers to track books.) I cut these in half, and taped them to make two pockets out of each one, as I needed smaller pockets. I wrapped the pocket portion in clear Contact paper to make it more durable.
Then I glued these in three rows (five in each row) on a pretty blue file folder. I used some file folder labels that were trimmed in blue below each one to indicate the level of question. I used the same levels as they do on the show: $100; $200; $300; $500; $1,000; $2,000; $4,000; $8,000; $16,000; $32,000; $64,000; $125,000; $250,000; $500,000; and $1,000,000. I put a gold sticker on the $1,000 and $32,000 pockets to indicate these as safe levels (Once reached this progress can not be lost.)
Now for the part that became the biggest hit with the kids: I used flat wooden spoons (The kind you can get at stores when you buy a malt cup or single serving of ice cream.) to make their playing pieces. These fit nicely into the pockets. To personalize each, I cut a snapshot of the child and glued his picture to the stick. I made some extra "players" in case a friend comes and wishes to play. He could chose from the Big Bird or Winnie the Pooh game pieces.
I made some special "lifeline" cards:
50/50 - The question will be rephrased as a True/False question or a choice of two answers will be given.
HELP - The player may ask anyone available for help...this can include calling Grandma on the phone.
BOOK - The player may get any book in the house and look up information.
NEW QUESTION - The player may choose to receive a completely new question.
HINT - The player will be given an age appropriate clue.
At the beginning of the game, these "lifeline" cards will be shuffled and three dealt to each player OR players may select three of their choice....some players like different ones than others.
For the game that I gave to my son's family, I included two sets of question cards I had from a trivia game that I bought at a used curriculum sale. I gave them the set for first graders and second graders as these were the right ages for the boys. However, I later made them some cards fitting more with things they are actually working on.....but they were so excited and wanted the game NOW.
TO PLAY:
Play is similar to the game show. However, we wanted all players to be able to play at the same time, not just one "contestant" (though this is a great game for the "only" child).
All players place their game piece in the first pocket. In turn each is asked a question and if successful, they move their game piece to the next level pocket. They may use their "lifeline" cards any time they choose for assistance with a question.
Any time a player wishes, he may quit and keep the money he has won. I made some fun money and pay the children. They can keep this money forever.....I just print some more. If a child, misses a question, he must return to the last "safe" pocket and collect that amount of money. He may, however, remain in the game...he simply must start at the beginning again.
When I was playing with the grandchildren the first time, and Kris made a mistake, he was heartbroken, but the pain seemed less as he received some fun money and realized that he was not out of the game...that he could start fresh again, with new "lifeline" cards. As it turned out, Kris was forced to start over more often than his older brother Kyle, however, Kris ended up with more money when we quit playing for the day. They left their game pieces right in the pockets so they could start up in the same places the next time we played....which turned out being within an hour as they were excited to get back to winning more money.
This game is fun for the whole family. Each member can be playing at his own level as the questions can come from cards made/selected especially for each one. Mom and Dad can participate too...get the questions from an adult trivia game for them to use.
Wednesday, July 15, 2015
Money Train Board Game
For those youngsters learning to count money.
This is a gameboard that I drew. It can be made as simple or fancy as you wish. Here is what I did:
A simple board would to be to find a picture of a train (optional) and just make a path for the train to follow. You can make any theme for your game and give it a different name and have it fit your child's interests or a unit you are currently doing. On each segment write amounts. Higher amounts can be used for children with greater ability.
TO PLAY:
Players, in turn, shake a die (or spin a spinner) to find out how many spaces they will move. They collect that amount (or lose if the space indicates that).
We use real coins from a mixture for this game.
I like using real coins as I have never found play coins I like well enough. These dollars are great as they look like real money that has been Xeroxed and shrunk.
As they play, I also encourage the children to exchange their small coins for larger coins and eventually into dollars. This helps them practice the equivalents.
We play to see who has the most money when all players reach the end. We also celebrate each player reaching the end. I don't like putting too much emphasis on having a winner, as there then must be losers....and no one wants to be one of them.
Tuesday, July 14, 2015
Wilbur - A Favorite Learning Tool
Remember Wilbur of "Charlotte's Web" fame?
Wilbur is a most versatile format and a favorite of young children.
Turn an old bleach bottle into a "funtastic" learning tool!
Draw eyes and a mouth with permanent markers.
Add pink felt ears and a pipe cleaner tail.
Use egg carton sections for feet.
Decorate sides as desired.
Cut a slit about 1/4 inch wide across his head, just behind his ears.
These were the old instructions for making Wilbur and I have made many this way. But, like everything else, he got an update.
This is the original very first Wilbur after his many face-lifts. This guy is around 30 years old. Looks pretty good for his age I think. The permanent marker needs a new paint job every few years to keep it bright. The tail has been replaced a few times and the ears have had to be reattached.
The biggest improvement is his feet. There has been much trial and error with these. Egg cartons just glued like in the first picture was the start. Different glues were tried. Later, stones were added to give extra weight and help with balance. The stones are important, be sure to add some to each egg carton section. Finally,one day I just grabbed the good old duct tape and covered it all. Finally, a good solid base that has held up for a couple years. The next improvement will be to look for a color different than the yellow and make it more to my liking. But the key is that he now works, is stable, and has held up for some time.
Here is Wilbur in action:
With a stack of skill cards placed in the slot, Wilbur is ready to teach. For these cards, Charlotte counted the items and stated the number.
To view the answer, the child removes the bottle cap and peers inside.
Charlotte removed the cap and looked inside to see the answer revealed. If she is correct, she simply takes the card out and another is already in place. NOTE: Children enjoy removing the cap, so I suggest they put it back on before they change the card.
Here is what she saw when she looked inside.
The cards should measure about 5 inches by 8 inches.
Put the "skill" at the top edge of the card.
The correct answer should be at the bottom center of the card.
Here are a few examples of the many possible skills that can be put on cards.
Douglas was beginning to read and we made these card for him to recognize his name and the names of those most important to him.
Beginning letter sounds
Beginning blends and diagraphs
Fill in the missing vowel
Read the number words
Addition
Multiplication
States and Capitals - notice this set was written by one of the children. Having them make the cards is just another step for them to be learning the skill.
Questions to review a unit on bees.
Wilbur is enjoyed by ALL ages and I guarantee when you put him out with some cards, EVERYONE will have to remove the cap and take a look.
Hope Wilbur is loved at your house as much as he is at ours.
Thursday, April 2, 2015
7 Sevens
7 Sevens is a fun game the whole family can play.
Children get practice with addition facts to 6+6 and recognizing numerals. They also learn to take turns and keep good attitudes while playing.
Grandsons Jacob, 8, and Aaron, almost 6, came for a visit and since we rarely have time with just us, we played some games.
7 Sevens is a favorite game of all the children. We play it in many different fashions. Today we used number cards and counters. Each player gets a set of cards numbered 2-12 and 7 counters.
The cards are placed in front of each player so they are visible to all. The counters are set to one side.
Two die are needed. I prefer to use numbered die rather than the ones that have the dots. The dots can be good for beginning players so they can use the dots as a visual for adding. However, these boys know or almost know the addition facts and just need more practice. Here a player rolled 2+2 which equals 4.
Since he rolled a four, he turns over his four card and the play moves to the next player.
The next roll...
...is 7 and this is the FUN part. Rolling a 7 costs the player one of his counters.
Play continues with each player taking turns rolling the dice and turning over the appropriate card or losing one of his counters. If a player has already turned the needed card over, he simply passes the dice to the next player.
When a player rolls a 7 and has to give up his last counter he is out of the game.
Poor Jacob.
But the game continues for Aaron and I....Who WINS? The first player to successfully turn over all his cards. This can be difficult because some of the numbers are harder to get. OR the winner is the last player in the game when other players have lost all their counters.
However...Grandma always wins in that I get to have a fun time with the children. Also they get some addition practice and they don't even realize they are "doing school." ....but don't tell them.
Tuesday, September 10, 2013
Go Fish Roman Numerals
Now we used the cards with the cute little fish on them for the game they were intended...GO FISH!
Here is Diana's hand. She had asked Douglas for a 3 and received one. So she had her first match.
Wesley is asking for a card. We played that if you were holding the Roman Numeral card you could simple state the number you needed to make the match. However, if you were holding the number and wanted a Roman Numeral you had to state how it would appear using I, V and X's. For example, Wesley requested XII since he had the 12 card in his hand.
Of course, the fun comes if the person does not have the card you request and says, "Go Fish!" Then you get to draw from the pond of cards in the center of play.
Douglas played with Wesley and Diana. We had a fun time.
Here is Diana's hand. She had asked Douglas for a 3 and received one. So she had her first match.
Wesley is asking for a card. We played that if you were holding the Roman Numeral card you could simple state the number you needed to make the match. However, if you were holding the number and wanted a Roman Numeral you had to state how it would appear using I, V and X's. For example, Wesley requested XII since he had the 12 card in his hand.
Of course, the fun comes if the person does not have the card you request and says, "Go Fish!" Then you get to draw from the pond of cards in the center of play.
Douglas played with Wesley and Diana. We had a fun time.
Roman Numeral Search
We call it SEARCH, but this game is known by other names, as well....Concentration and Memory.
We began with only 10 cards - the 1 - 5 and their Roman Numeral matches.
Ladies first...so Diana started and selected two cards which were not a match.
Wesley went next and made a match with the 5.
Later Diana made her first match.
Then we tried the game with all 24 cards (1-12 and the matching Roman Numerals).
We put the numbers to one side and the Roman Numerals to the other in an attempt to make it a little easier for Diana.
You can see she is a little overwhelmed with the number of cards.
So...Douglas stepped in and took her place.
Douglas matches the 8.
Wesley matches the 3.
It was a much better game and the boys both enjoyed it. Wesley got more practice.
We began with only 10 cards - the 1 - 5 and their Roman Numeral matches.
Ladies first...so Diana started and selected two cards which were not a match.
Wesley went next and made a match with the 5.
Later Diana made her first match.
Then we tried the game with all 24 cards (1-12 and the matching Roman Numerals).
We put the numbers to one side and the Roman Numerals to the other in an attempt to make it a little easier for Diana.
You can see she is a little overwhelmed with the number of cards.
So...Douglas stepped in and took her place.
Douglas matches the 8.
Wesley matches the 3.
It was a much better game and the boys both enjoyed it. Wesley got more practice.
Roman Numeral Match
We introduced Diana,4, to Roman Numerals today. She caught on fairly quickly. Wesley needed the quick review and he remembered them all.
The Cards
The cards were made to be played for a Go Fish game, which is why the cute little fish is on each card. The deck consists of 24 cards: 1 - 12 in both Roman and Arabic numerals.
First we set out the 1-12 cards. The Roman Numeral cards were shuffled and up in a stack. Diana drew cards and handed them to Wesley to place above the correct number.
Wesley would state the number as he placed the Roman Numeral cards. He would also explain each card/number to Diana. This gave him good review and continued Diana's introduction to Roman Numerals.
Activity finished...
Now Diana gets a turn.
Wesley handed her one card at a time and she place the number below the correct Roman Numeral. This was quite easy, but it gave her some confidence.
Next we did the first activity again with both children taking turns.
Diana was excited to get one she knew.
...and she knew right where to put it.
We had fun. Wesley got some good review and Diana got her first introduction to Roman Numerals.
The Cards
The cards were made to be played for a Go Fish game, which is why the cute little fish is on each card. The deck consists of 24 cards: 1 - 12 in both Roman and Arabic numerals.
First we set out the 1-12 cards. The Roman Numeral cards were shuffled and up in a stack. Diana drew cards and handed them to Wesley to place above the correct number.
Wesley would state the number as he placed the Roman Numeral cards. He would also explain each card/number to Diana. This gave him good review and continued Diana's introduction to Roman Numerals.
Activity finished...
Now Diana gets a turn.
Wesley handed her one card at a time and she place the number below the correct Roman Numeral. This was quite easy, but it gave her some confidence.
Next we did the first activity again with both children taking turns.
Diana was excited to get one she knew.
...and she knew right where to put it.
We had fun. Wesley got some good review and Diana got her first introduction to Roman Numerals.
Subscribe to:
Posts (Atom)